PixKit
How to Crop a Photo to an Exact Aspect Ratio (1:1, 4:5, 16:9)
A step-by-step guide to cropping photos to square, portrait and widescreen ratios for profile pictures, social posts and thumbnails — without losing quality.
What an aspect ratio is
An aspect ratio describes the shape of a picture as width : height. A 1:1 image is a perfect square, 4:5 is a slightly tall portrait, 3:2 is the classic camera shape and 16:9 is the widescreen shape used by video. The ratio says nothing about how many pixels there are — a 1:1 image can be 400 × 400 or 4000 × 4000.
Platforms and forms care about ratio because they display images in fixed frames. If your picture does not match, the platform crops it for you and often cuts off the part you cared about.
Which ratio for which job
- 1:1 (square): profile pictures, avatars, product thumbnails and many marketplace listings.
- 4:5 (portrait): the tallest shape most feeds show in full; ideal for portrait posts.
- 3:4 and 2:3: print-style portraits and many ID or application photos.
- 3:2: standard camera photos and 6 × 4 inch prints.
- 16:9: video thumbnails, presentation slides and website banners.
- 9:16: stories, reels and full-screen vertical video.
Tip: if a form asks for “35 × 45 mm” or “3.5 × 4.5 cm”, that is a 7:9 ratio. Choose Free in the cropper and size the frame accordingly, or use a settings link from the form.
Step-by-step: crop with PixKit
- Open the Crop tool and choose a photo — or drag one onto the page.
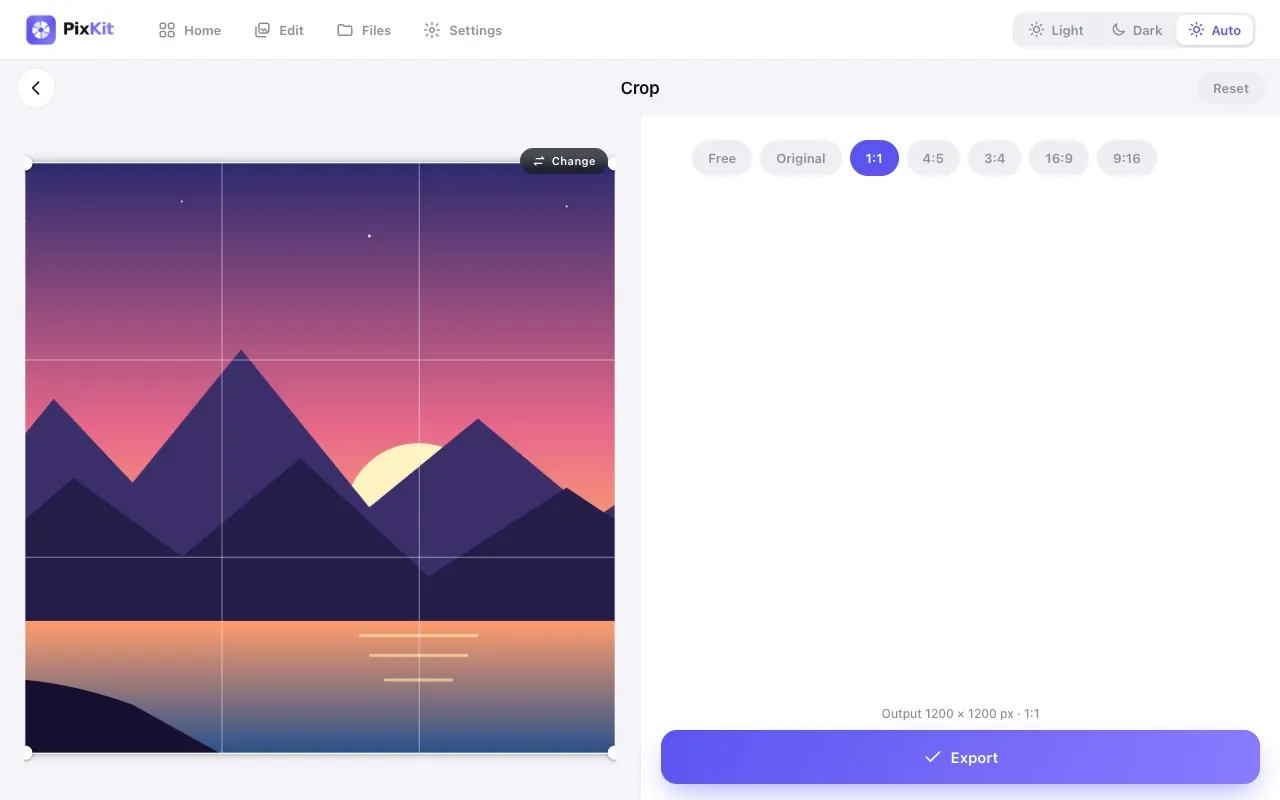
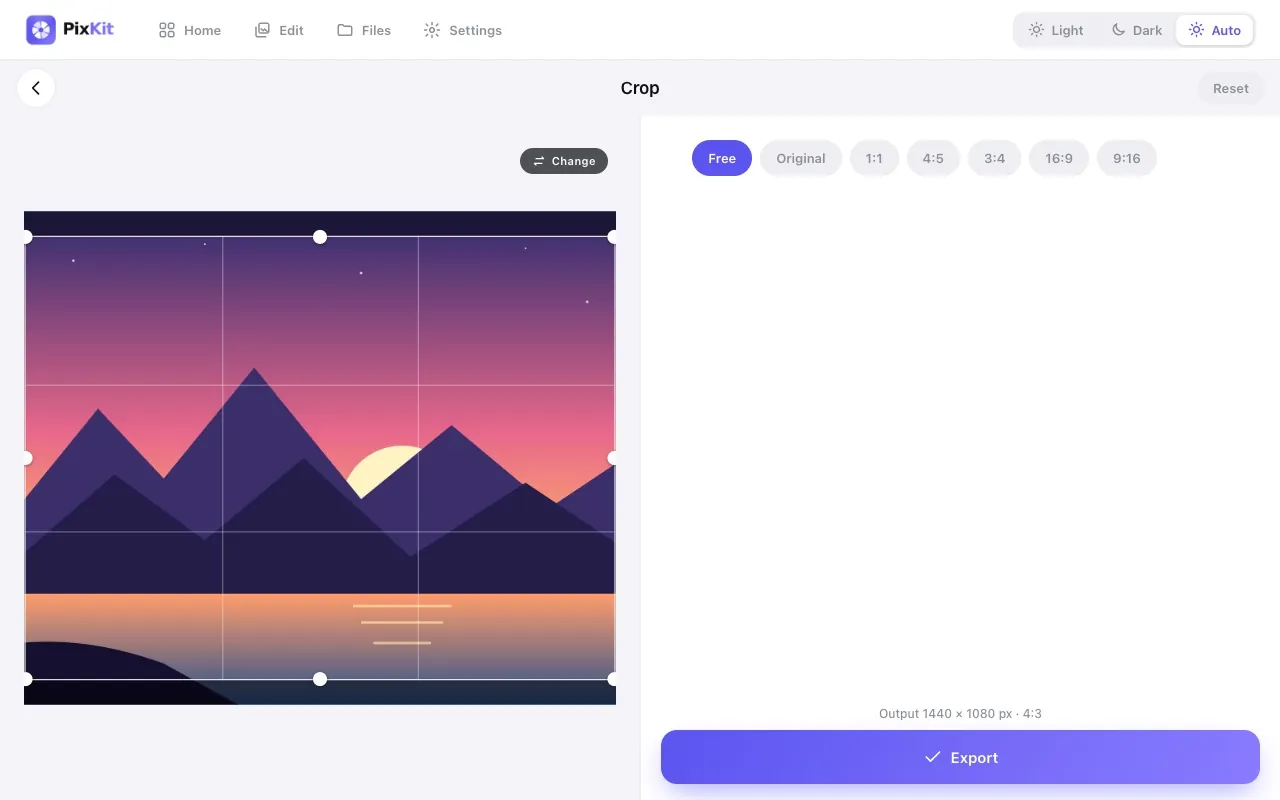
- Pick a ratio chip at the top: Free, Original, 1:1, 4:5, 3:4, 16:9 or 9:16. The crop frame snaps to that shape immediately.
- Drag inside the frame to move it, and drag the corner handles to resize it. The frame keeps the ratio you chose.
- Check the line at the bottom of the screen: it shows the exact output size in pixels, for example “Output 1200 × 1200 px · 1:1”.
- Press Export, then Download, Copy or Share on the result screen.
Composition: where to put the frame
A crop is also a chance to improve the picture. Place the subject on one of the thirds lines instead of dead centre, leave a little space in the direction they are looking, and avoid slicing through hands, feet or the top of a head. For faces in a square crop, keep the eyes roughly one third from the top.
Tilted horizon? Straighten first in the Rotate tool, then crop — rotating after cropping would cut into the corners twice.
Keeping quality high
Cropping removes pixels outside the frame but does not blur the rest. The only quality change comes from exporting to a lossy format such as JPEG, and that happens once. Crop from your original file rather than an already-compressed copy, and do any compression as the last step.
If the cropped image ends up too small for its destination, do not enlarge it — that adds file size without adding detail. Re-crop a larger area of the original instead.
Common mistakes
- Cropping too tightly around faces so the result feels cramped.
- Forgetting that a ratio change can remove text near the edges of screenshots.
- Cropping an already tiny image, which leaves too few pixels for printing.
- Exporting to PNG for a photo, which creates a needlessly large file.
Try Crop Image freeAbout this tool
More guides